Next: JuxMem extension
Up: Working with a DIET
Previous: Installation and configuration
Contents
Deploying a DIET platform
Please refer to the previous chapter for more information concerning
things to do before deploying the platform.
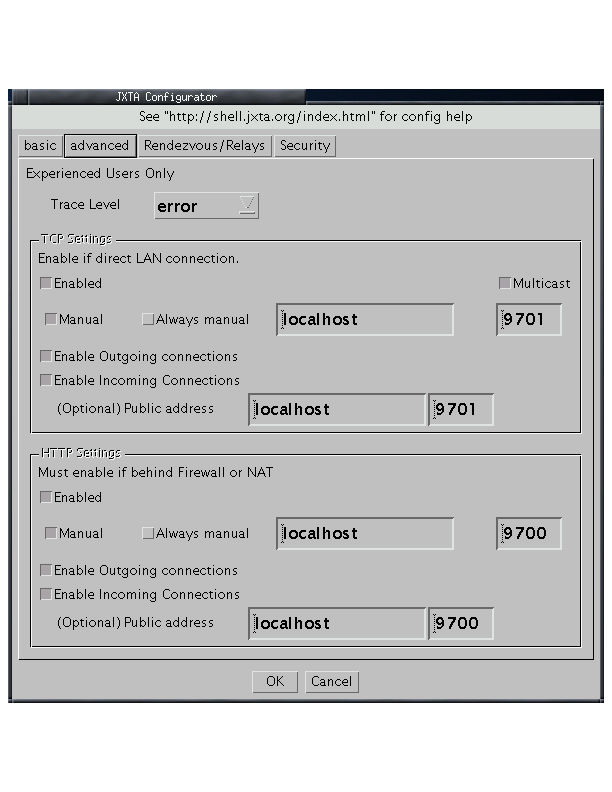
Figure 12.2:
Configuring JXTA
|
|
- First step: launching a MA. After having set
the LD_LIBRARY_PATH,
OMNIORB_CONFIG and
OMNINAMES_LOGDIR paths, DIET is ready to run, except
the JXTA part :
- Set an environment variable called JXTA_LIB
containing the path to the JXTA JAR files. They are by default
provided in the <diet_root>/src/lib directory.
- At last, the command to be launched to run a MA is:
$ java -cp <JXTA_JARS> JXTAMultiMA
<DIET_MA_config_file>
Ensure that this command is
launched inside the right directory : indeed, only one peer can
be launched by directory : information concerning this peer is
available in a .jxta directory under the directory
where you launched the peer. Delete this directory before
launching a peer if you have already used it on another machine,
in order to clean the platform configuration.
- Each time a new JXTA peer is launched, you have to configure
it. On the first setup screen, the name of the peer is required
and must be unique, for instance, ``MA1'' for the first MA
you load. The second screen, named ``advanced'', displays the
TCP and HTTP settings. When using DIET on a single
machine, the configuration is as shown on
Figure 12.2, else, just replace localhost
by the IP address of the machine. Please note that, for each
peer on a single machine, the TCP and HTTP ports have to be
different. For instance : 9701 and 9700 for the first peer, 9703
and 9702 for the second, etc. The third setup screen deals with
the web access. If you want to access peers outside the local
network, references of rendezvous and relay peers placed at the
disposal of JXTA users by the JXTA community can be
downloaded. Otherwise, don't do anything with this screen. The
last screen deals with username and password, but these
parameters are filled with default values.
- Second step: registering a SeD to the MA. Be sure that
the parentName inside the configuration file matches the
name of the MA previously launched. The command to run is:
$ java -cp <JXTA_JARS> JXTASeD
<DIET_SeD_config_file> <computation_abilities>
If you want to put LA(s) between the MA and the
SeD, launch the following command before loading the SeD:
$ java LA <DIET_LA_config_file>
Check the DIET tree coherence and the parentName
variables inside the configuration files.
- Third step: Launch a client with the command:
$ java -cp <JXTA_JARS> JXTAClient <pb>
At this point, you still haven't tested the Multi-MA. To achieve this,
launch other MA(s) and launch again the client.
Scripts have been left at your disposal. You just need to check the
environment variables and paths required. As said before, only one
JXTA peer can be run in one directory, so each script is inside a
different one. These directories have to be edited (for
configuration), are named MMA1/, MMA2/,
MMA3/, LA1/, SeD1/, SeD2/ and
client/. and are located in :
<DIET_root>/src/examples/JXTA/scripts.
Next: JuxMem extension
Up: Working with a DIET
Previous: Installation and configuration
Contents
DIET Team - 2008-07-17